Thursday, March 31, 2011

What a Difference a Color Change Makes

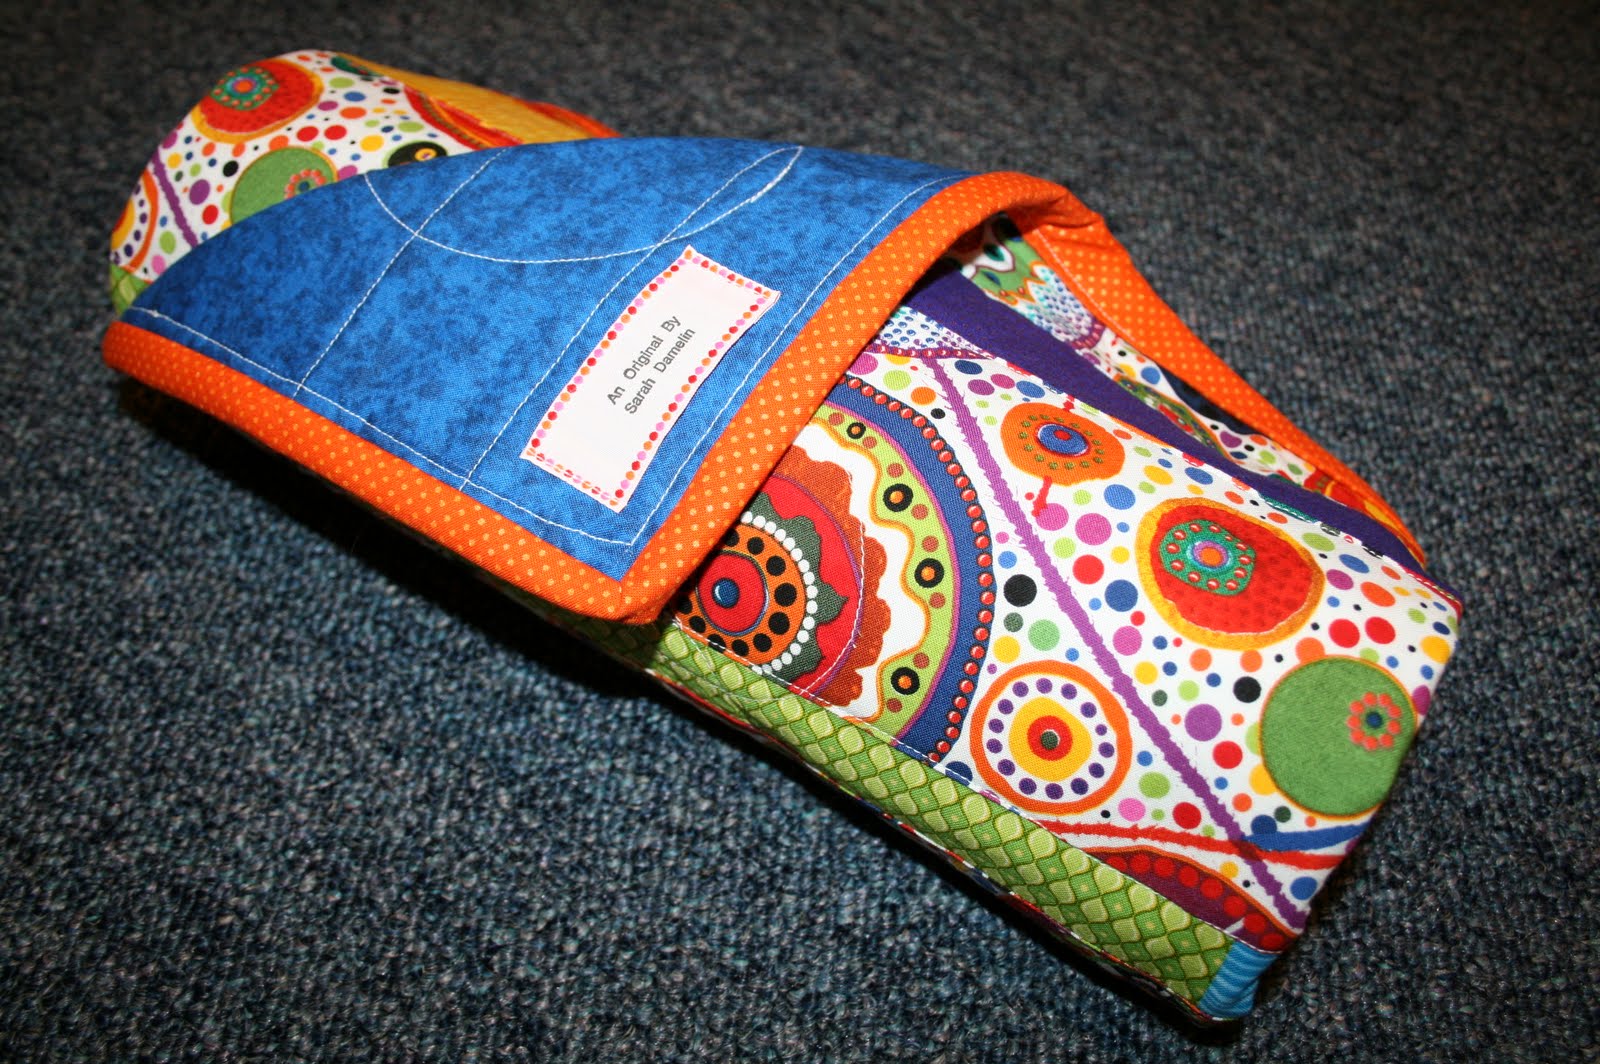
Just a short post to share these photos of a quilt I finished today. If it looks familiar, there's good reason. Check out this post from a few weeks ago.
These two quilts are almost exactly the same layout. The main differences in the fabrics are color and style. The color change is pretty obvious. The style of the pink one is more vintage in feel, and the bright one from today is more modern and bold. I love them both, but it's always a bit astonishing to see how much can change by swapping out fabrics.

That's really all I have to say.

Here are some glamor shots of the newest member of quiltdom...

Detail of top.

Back

All ready to go.

This quilt makes me happy. And, with Leah as my focus group, it makes babies happy, too. Hope the recipient feels the same way.

Tuesday, March 22, 2011

Portrait of a Hamantaschen

I've never really liked Hamantaschen. This fact is not all that surprising as I generally don't enjoy most things jelly-filled. As a child, around Purim time, we would receive many Shalach Manot, traditional "care packages" from friends. These packages always included some of this traditional holiday cookie (triangular to mimic the shape of the villain Haman's hat, hence the name). I remember my sister always loving the ones filled with apricot jam. And I remember trying every year to make a few that were filled with Hershey's kisses in an effort to transform them into jam-free chocolate chip cookies. They were never that great.

This year, when reading some Purim books with my 3 1/2 year old sous chef, we discussed these cookies and decided to make a batch together. She asked if we could put something inside other than jelly (ah, a child after my own heart). We made chocolate filled Hamantaschen, but two minor changes from my Kisses days made these the best darn holiday cookie I've ever had. Keep reading to find out what those two changes were.
First of all, we invited a friend of Naomi's over for a Hamantaschen baking play date. I divided the dough into eight small pieces.I then rolled each of the balls of dough on a piece of wax paper. Each piece, once rolled to 1/4 inch thickness, was big enough to cut five cookies using our trusty IKEA plastic cups as cutters. These cups are easy for little hands to manipulate and safe for them to handle. I figured each kid, and there were three making cookies, might have the patience to cut out and fill her five cookies. I think that giving each a pre-rolled sheet of dough made the whole endeavor approachable for them.
We arranged a dozen circles on a parchment lined baking sheet. Then the older girls, both 3 1/2, counted seven chocolate chips into the center of each circle. This is change #1. Hershey's Kisses look great and fit perfectly in the center of these cookies. But they never melt into gooey warm bits. Use regular semi-sweet morsels instead.Here you can see change #2. I've never before seen a Hamantaschen with sprinkles. But when the kids in charge both asked for sprinkles on their cookies, I was happy to oblige. A little egg wash on the outside of the triangle prepped the dough for sprinkle-dom. This part got messy, as sprinkles rained onto my then-shockingly-clean kitchen floor. One girl dropped a bunch of sprinkles around each cookie while the other worked carefully to place all her sprinkles inside the opening on the top of the cookies. (If you know Naomi, I bet you can guess which was her approach.) Finally, the batch was all ready to pop into the oven.I cannot describe how good the house smelled when this tray was ready.What could be better than a sugar-chocolate-chip-cookie-with-sprinkles? They were so good. If you're a jam-lover or just a traditionalist, have no fear. After the kids had finished their batch, I used all the remaining dough making more Hamantaschen, including some stuffed with apricot and raspberry pie filling. I also made a tray of mini ones, bite sized cookies made using a shot glass. (The photo at the top shows that tray on its way into the oven.) These were a bit tedious to make, but amazing to have on hand over the last few days. The perfect little bite.
This is the whole family- large and small in each flavor. They all came out so great. I don't think I can remember a batch of Hamantaschen that didn't explode all over my baking sheet. I brushed the inside corners with egg wash before pinching the cookie closed, so maybe that explains why they looked so great. And why it was so easy to clean the baking sheets afterward.

Seriously, I think this might have been the most beautiful Hamantasch I've ever seen. It was certainly the nicest looking one I've ever made.

Monday, February 28, 2011

Pez Dispenser Display


When considering what kind of gift my soon-to-be six-year-old niece would like for her birthday, I thought about her blooming Pez dispenser collection. I immediately remembered a Pex display I once saw somewhere which used ribbon to make small loops through which to hang your Pez. Add this project to the list of things that are not my idea, but I haven't the slightest clue as to where or when I saw it. It was some time ago, I think, and the original that I can still see in my head was a larger board, with many strips of Pez "hooks" on it. This adaptation is for a 24 x 6 inch board, and it holds twelve Pez dispensers, each framed by a different fabric backing. (I imagine there are some other uses for a board like this. For example, smaller ribbon, more strips and loops, might make for a cool jewelry storage/display.)

1. I started by choosing twelve turqoise fabrics from my stash. I cut 2 1/2 by 8 inch strips from each.

2. Sew the strips together, using 1/4 inch seams, so the fabric strips are 2 inches a piece.
3. Choose a grosgrain ribbon about an inch wide that either coordinates or contrasts with your fabric. For a 24 inch long board, I used 36 inches of ribbon plus 2 extra on each end. 40 inches total. That works out to 3 inches of ribbon for each 2 inch fabric parking space.
Pin the ribbon on the fabric seams, leaving slack in the ribbon. Make sure there are three inches of ribbon between ever pin. There will be loops of ribbon. Sew 1/4 inch to each side of the seam. This left a loop that allowed my Pez to slide in, but didn't let any of them fall through. If you have a Pez dispenser with a small, vertically shaped top, you will need a smaller loop. This size loop even worked for my Nemo Pez, which has a tail that makes it sit on a slant.
4. Now it's time for some upholstery. I used a pine board, Home Depot has them for $5 six inches by six feet. They cut a 24" piece for me. I cut a piece of batting just smaller than my fabric piece. Square it all up right side down with the board on top. Pull edges of fabric over the edge of the wood and staple down. Start from the center of a side and work your way out. (For basic upholstery instructions click here.)
Pull corners taught and staple them down a few times.
5. It's done. Here's a shot of the back:

And here's a close-up of the front:

I added two of those zig-zaggy art hangers from the hardware store to the back. This thing is ready to ship out.

Pesto Portabellas

Years ago I made some version of this recipe with friends in their Brooklyn apartment. One of them found the original recipe in a cookbook she had. I have no idea which cookbook it was, nor do I use the exact original recipe. As you'll see, there's not really a need to reference the cookbook anyway; this recipe is so easy to make.

Ingredients: makes 4 servings
Portabella caps- about 8 good sized ones, 2 per serving.
4 average sized carrots- peeled
4 small zucchini or equivalent volume
1 package of white mushrooms- cleaned, stems removed
Pesto
Parmesan cheese
Olive oil

Directions:
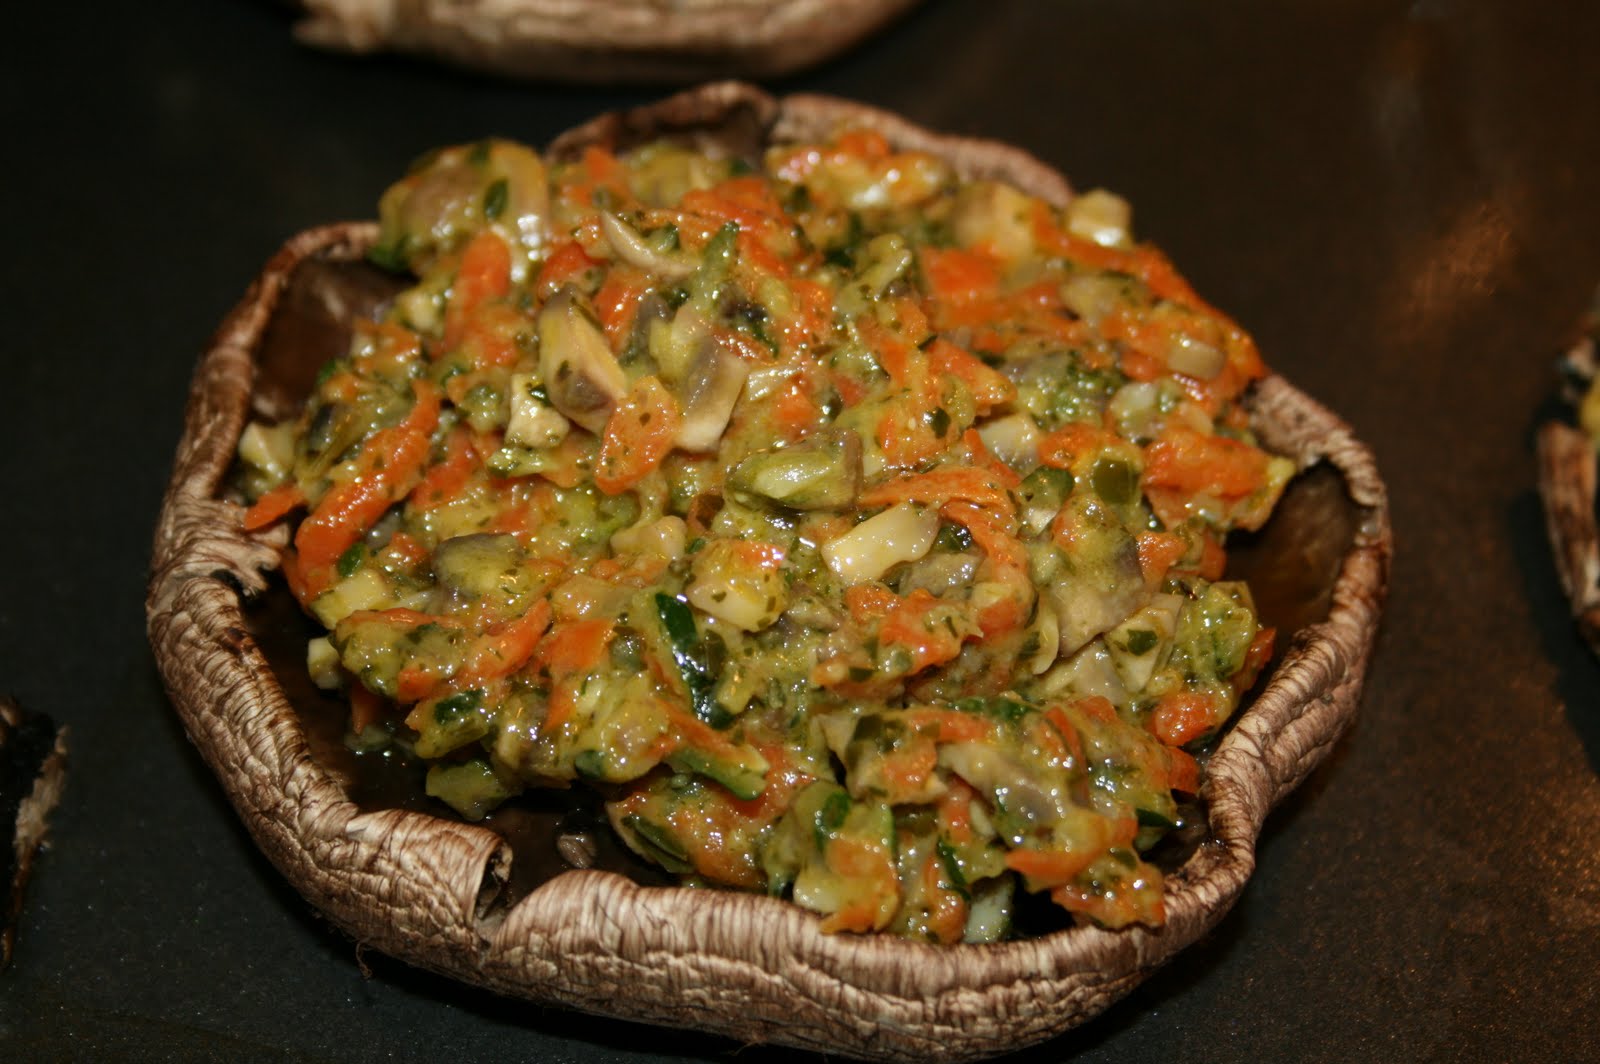
1. Prep portabella caps. Remove stem, and scrape all ribs from the underside. Place caps upside-down on a baking sheet. (Optional, drizzle with olive oil.) Place baking sheet in a 350 degree oven.

2. Prep stuffing. Either hand dice or food processor grate all carrots and zucchini. Heat 1-2 Tbsp of olive oil in a large skillet. Add grated veggies.


3. Chop white mushrooms. Add them to the skillet when zucchini and carrots are getting soft.

4. Cook mixture in pan until all veggies are soft and zucchini is sort of translucent. Stir in 1/3 to 1/2 cup of pesto. Stir just long enough to soften pesto and "glue" stuffing together.

5. Remove baking sheet from oven. Tilt to pour any water from the center of the mushroom caps. Equally divide stuffing among all portabellas. Place baking sheet back into the oven.

6. After about 10 minutes, remove baking sheet. Use a vegetable peeler to shave a few large pieces of Parmesan onto each mushroom. Put pan back in oven.

7. After about 5 minutes the cheese should be just melted. Remove from oven. Done.

We like to serve this with orzo and salad. It's a great vegetarian option.

Monday, February 14, 2011

Rainbow Layer Dresses


After I found this tutorial online and really wanted to make one of these dresses for my daughter. I read the tutorial, figured out the necessary math, and got inspired by this photo. Initially, I was going to make one for Leah who's 9 months old. Of course, when Naomi who's 3 1/2, saw the picture on the computer, she wanted one, too. At Naomi's request, their dresses are "opposites." In this case that simply means that one is in rainbow order from the top down while the other is in rainbow order from the bottom up. This tutorial is the way I constructed the skirts of both dresses. It took me a second to figure out the calculations the first time, but the second time around was a breeze.

Again, go to the tutorial for more specific information on the skirt, but here's the quick low down.
Cut a million little squares. The exact number and size will vary from dress to dress depending on the measurements of your small person.Sew the squares into long strip. Then connect the ends to make a ring of each row.Gather the top edge of one ring before attaching it to the bottom edge of the ring above. (For my second dress I skipped this step and hand pinned small pleats into the rings as I added them. either way works.) Repeat this step until all layers are attached.
Hem the bottom edge, add any embellishment you want, and...
The skirt is done. (I'd actually recommend hemming and embellishing the bottom ring before gathering it and attaching it to the rest of the skirt.)

To make the tops of the dresses I traced similar style items from each of the girls' closets, hoping that would help make them the right size. This isn't meant to be a true tutorial, so rather than bore you with all the details, here's a little photo journal of the top-making process.


The red top has shoulder strap button closures and very large arm holes which will allow for some growing. The purple has tie shoulder straps, which are fully adjustable.

I don't plan to ever put the girls in these dresses at the same time, though Noami might have other plans. Either way, I can't wait for spring when I can watch these two monkeys spin and twirl barefoot in the grass outside or in the sand at the beach.