When considering what kind of gift my soon-to-be six-year-old niece would like for her birthday, I thought about her blooming Pez dispenser collection. I immediately remembered a Pex display I once saw somewhere which used ribbon to make small loops through which to hang your Pez. Add this project to the list of things that are not my idea, but I haven't the slightest clue as to where or when I saw it. It was some time ago, I think, and the original that I can still see in my head was a larger board, with many strips of Pez "hooks" on it. This adaptation is for a 24 x 6 inch board, and it holds twelve Pez dispensers, each framed by a different fabric backing. (I imagine there are some other uses for a board like this. For example, smaller ribbon, more strips and loops, might make for a cool jewelry storage/display.)
1. I started by choosing twelve turqoise fabrics from my stash. I cut 2 1/2 by 8 inch strips from each.
2. Sew the strips together, using 1/4 inch seams, so the fabric strips are 2 inches a piece.
3. Choose a grosgrain ribbon about an inch wide that either coordinates or contrasts with your fabric. For a 24 inch long board, I used 36 inches of ribbon plus 2 extra on each end. 40 inches total. That works out to 3 inches of ribbon for each 2 inch fabric parking space.
Pin the ribbon on the fabric seams, leaving slack in the ribbon. Make sure there are three inches of ribbon between ever pin. There will be loops of ribbon. Sew 1/4 inch to each side of the seam. This left a loop that allowed my Pez to slide in, but didn't let any of them fall through. If you have a Pez dispenser with a small, vertically shaped top, you will need a smaller loop. This size loop even worked for my Nemo Pez, which has a tail that makes it sit on a slant.
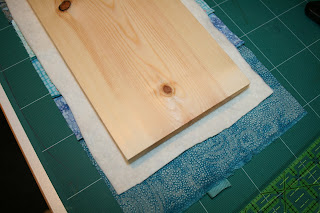
4. Now it's time for some upholstery. I used a pine board, Home Depot has them for $5 six inches by six feet. They cut a 24" piece for me. I cut a piece of batting just smaller than my fabric piece. Square it all up right side down with the board on top. Pull edges of fabric over the edge of the wood and staple down. Start from the center of a side and work your way out. (For basic upholstery instructions click here.)
Pull corners taught and staple them down a few times.
5. It's done. Here's a shot of the back:
And here's a close-up of the front:
I added two of those zig-zaggy art hangers from the hardware store to the back. This thing is ready to ship out.


No comments:
Post a Comment