These directions are adapted from Martha Stewart.
Tools and Materials
- Wren or Friesian templates, both of which are down-loadable from the link above. (This time I used the friesian template.)
- Blank canvas. For my horse I used a 12" x 12". The set is three 8" x 8" canvases.
- Fabric. I recommend a fabric that is all colors in one family, otherwise it will be hard to choose a contrasting paint. Look for something like some of these by Kaffe Fassett.
- Staple gun
- Clear medium gloss
- Scissors or utility knife
- Paint
- Paintbrush
1. Start with a blank canvases. Trim fabric to appropriate size to cover the front and stretch around to the back of the canvas, approximately the dimensions of the canvas plus 2 to 3 inches.Stretch and secure two opposite sides of the fabric onto the canvas back with a staple gun. After folding in the corners neatly, stretch and secure the fabric onto each of the remaining two sides. Always start from the center and work outward so your fabric doesn't pucker.
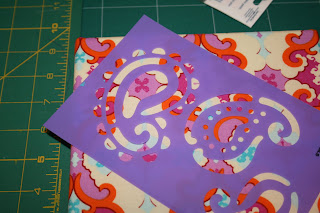
3. Download and print the template that you want. There are other templates on that site, too. Try these farm or ocean animal sets, and you could clearly use any shape or stencil you have. (The small set I made uses a paisley stencil from Michael's craft store.) Cut template out using scissors or a utility knife to create paper silhouette. I traced the template onto stencil paper so it would be more durable for reuse.
4. Position the negative paper silhouette on the fabric canvas where you want your image to be.
5. Select color of paint and paint the stencil. Peel stencil off carefully. Allow paint to dry.
Keep reading to see the development of the mini triptych.


I really like the ones with the paisley. The combination of colors is lovely. I don't really have any wall space, but if you're looking to get rid of them you should build up a bit of a catalog and try selling them on Etsy.
ReplyDelete