Monday, January 31, 2011

Easy Hooded Towel

Hooded towels are a wonderful thing. However, if you're anything like me, you've discovered that babies grow out of them well within their first year, and it can be hard to find big-kid hooded towels. The Company Store has a lot of cute ones, but they're out of my towel-price range. Pottery Barn Kids has some simple ones, but they only come in the PBK colors which make me crazy: light pink, dark pink, purple, blue, green. Come on, people! Am I the only one who wants my girls to know there are more colors in the rainbow than pink and purple? I imagine I'm not.

Enter Joann. Joann fabric, while not my go-to for quilting cottons (I'm a snob who prefers modern fabric designers' lines) is a great place to find other sewing supplies. Like, for example, many colors of solid terrycloth. A few months back I got a bright turquoise that turned into this towel:My daughter chose the fabric for the embellishment from my stash. I also let her choose what shape to sew on. She wanted hearts, and she specified that she wanted different sizes. I ironed fusible stabilizer to the back of the applique fabric. This was plenty to help the fabric hold it's shape while sewing and has actually kept the hearts from fraying at all.

The shapes are sewn on with a zigzag around the edge, and the whole towel is trimmed with pre-made bias binding. You could also just hem the terrycloth, but I like the addition of a contrasting color.
I just made this one as a gift (pretend to be surprised if it arrives in your mail). It's the same basic design as the turquoise one above, just with a different applique. I took some process photos this time, in case you're curious about how-to.

The towel itself is a 45" x 36" rectangle. You could buy one yard of terrycloth and make a plain towel. Or, get 1 1/3 yards to make one with a hood.

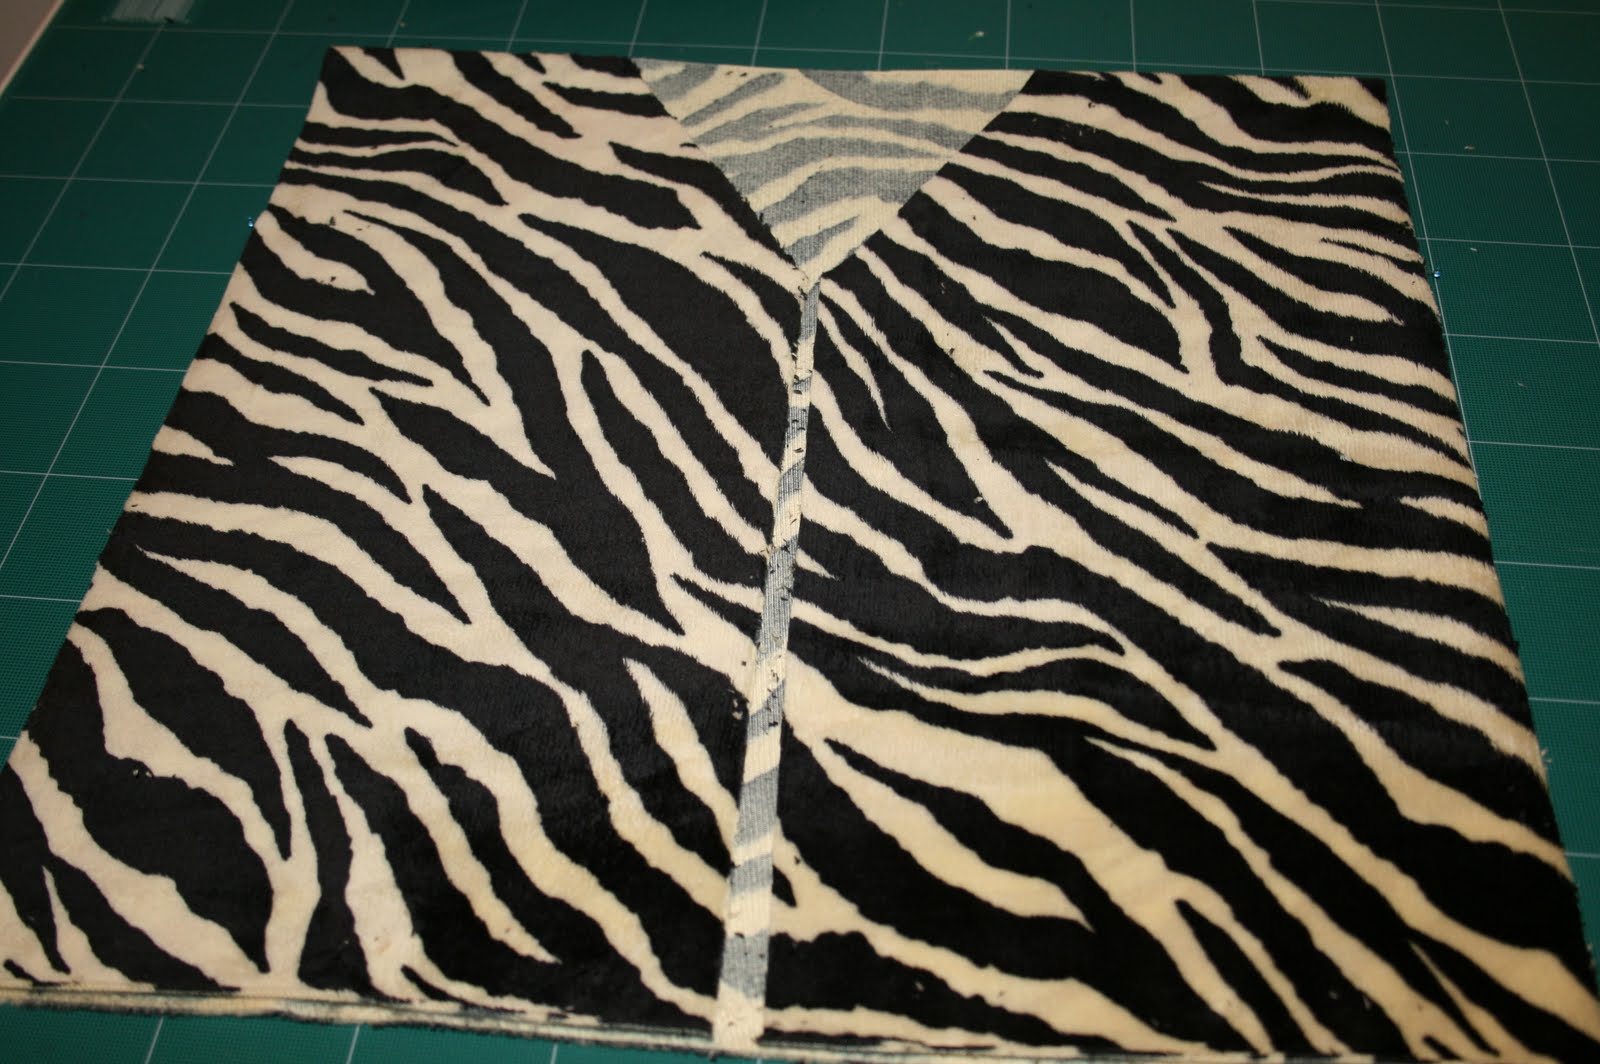
The hood is an 11 1/2" x 23" rectangle.
Trim one long edge with your binding, and sew on any applique where you want it. After the hood is sewn folded it's much harder to maneuver in the machine.
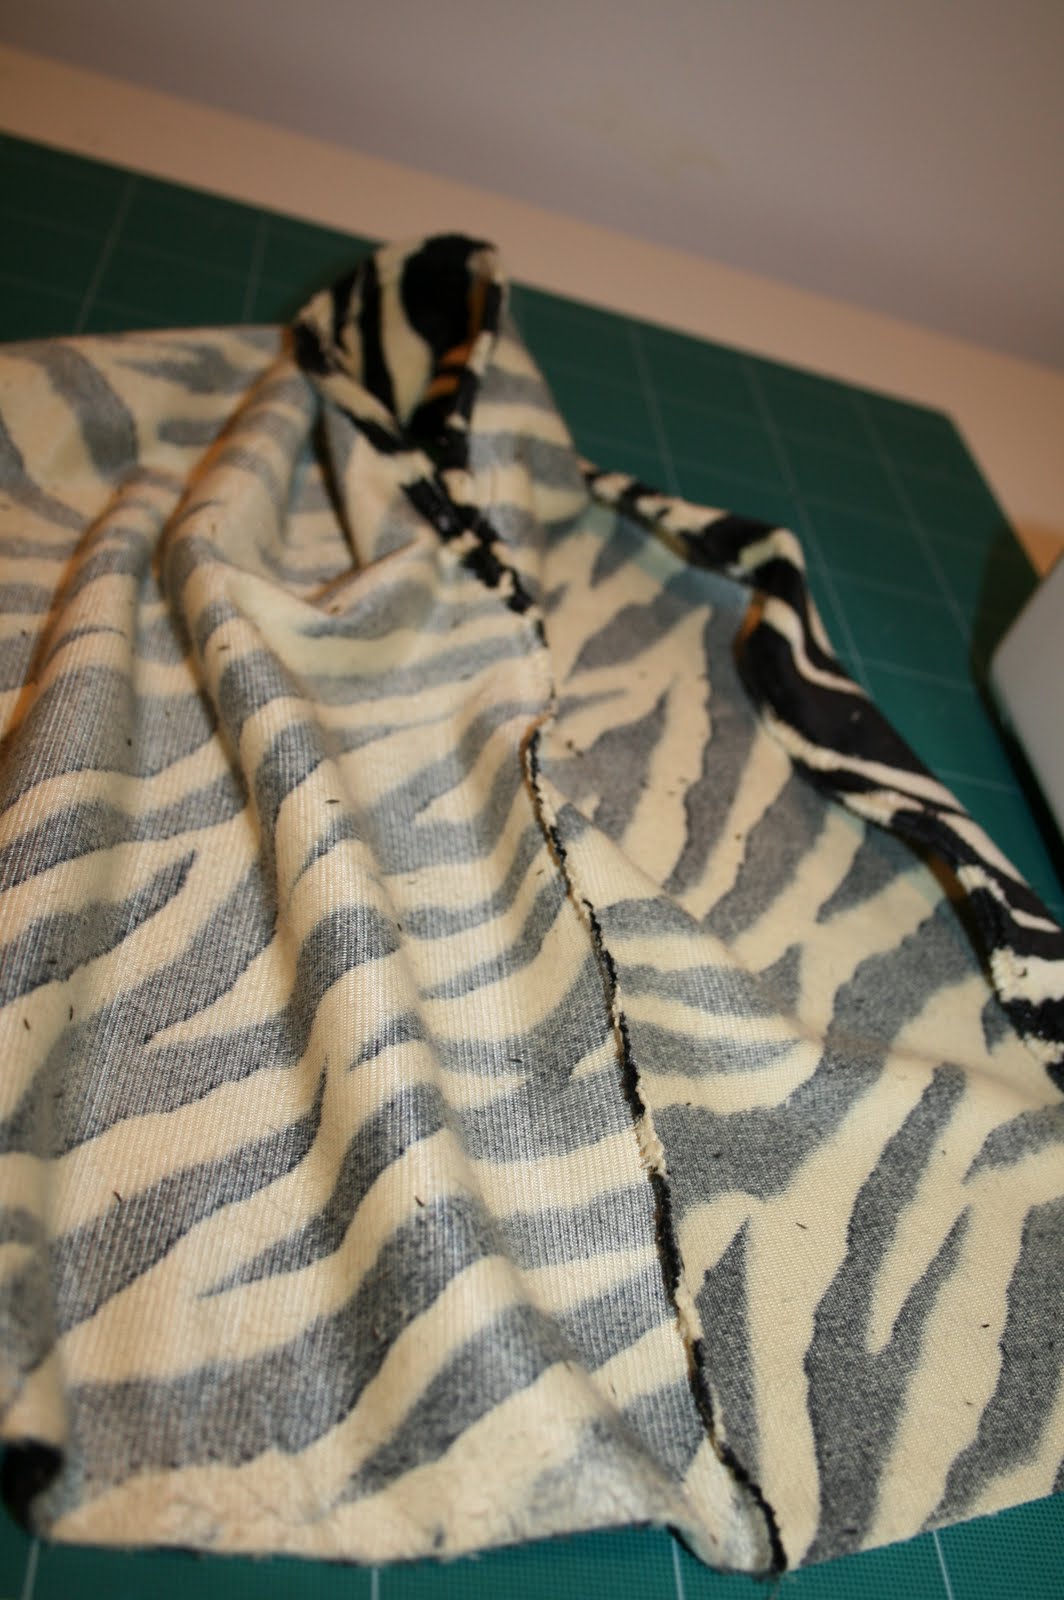
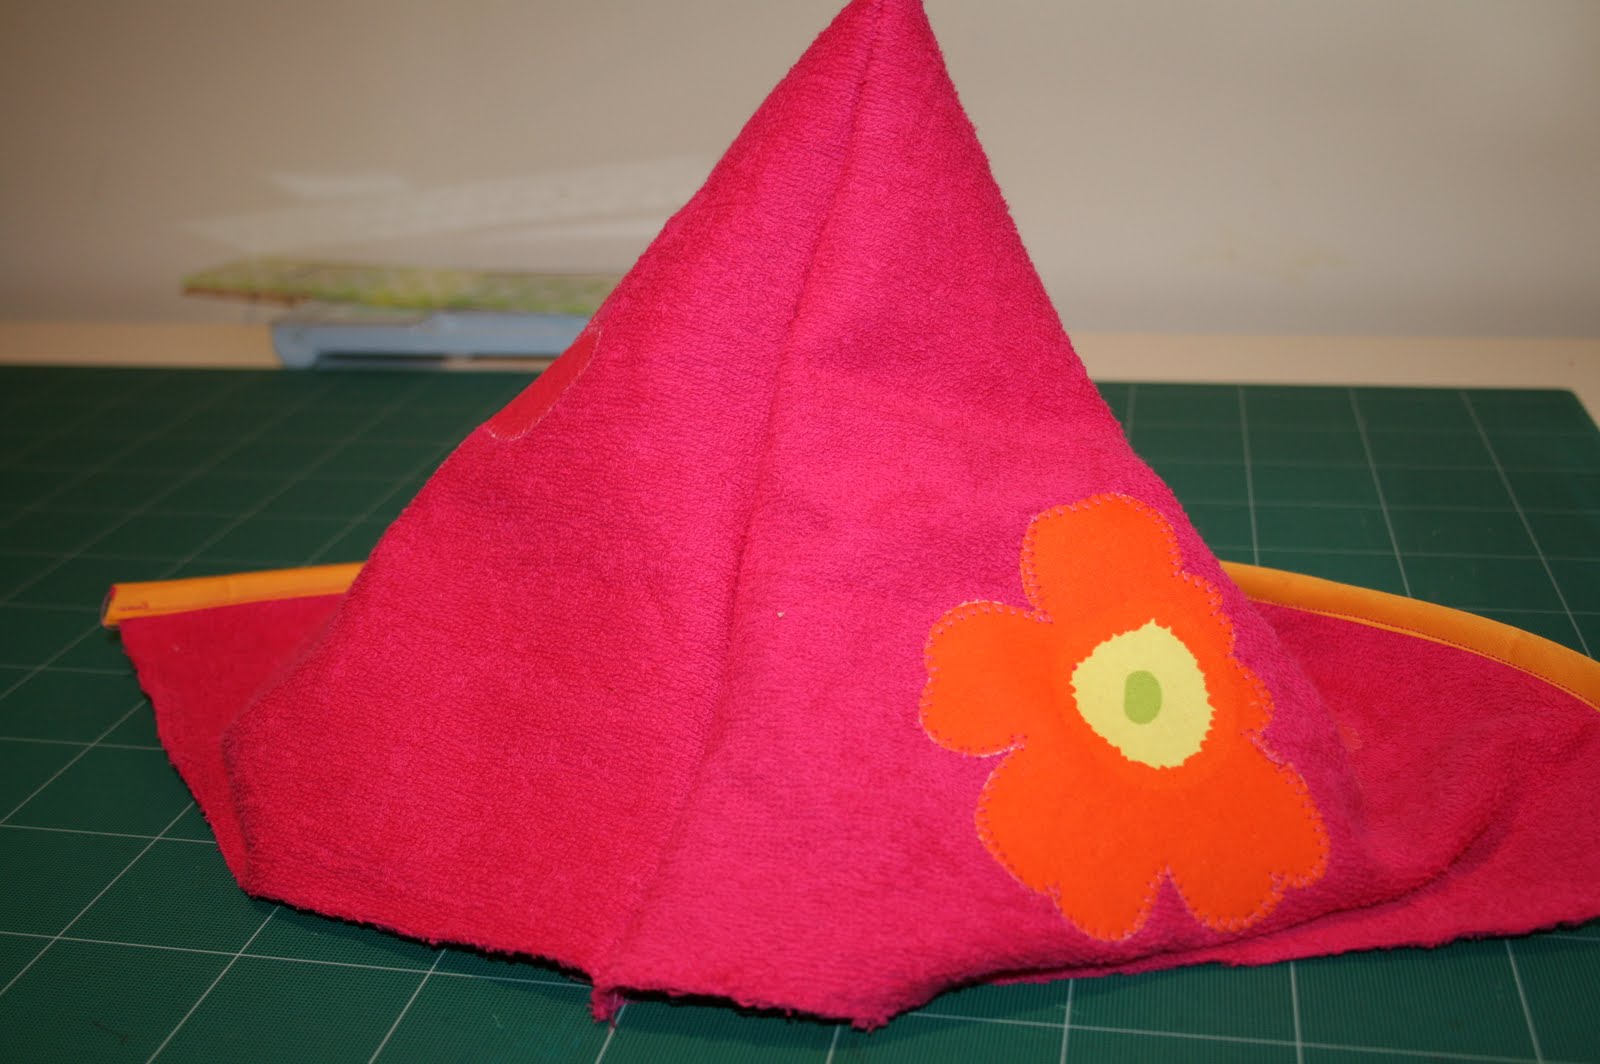
Fold the hood in half so the short sides meet, right sides together. Sew a zigzag seam opposite the side with the binding. Turn right side out, and poke the corner of the hood out with any blunt tool.
Trim your entire large towel rectangle with binding. Find the center of a long side, and line it up with the seam of your hood. Overlap the hood edge on top of the towel edge. Sew together.Add any additional applique to the large rectangle either before or after attaching the hood. I like to sew it on after so I can see how the layout will work with the applique on the hood.

As an alternative, you can easily use pre-made towels and just add your own hood. Last week, a friend came over for help turning some plain, but adorable, space-print towels into hooded ones for her almost-one-year-old. These towels were all from Kohl's and T J Maxx, making the materials cost for 3 hooded towels about 15-20 dollars.

We cut three 11 1/2 x 23 inch rectangles out of a plain white towel to make the hoods. As a way to unify the white hood with the blue towel, we attached some scrap stars to the hood just as the hearts were attached earlier. Here's the finished product:
This is a great way to make hooded towels that coordinate with your linens, if coordination is your kind of thing. They're adorable, if I do say so myself.

Friday, January 28, 2011

Ugli on the Outside

Don't judge a book by it's cover. We've all heard the age-old adage. I've heard children admit that they do, in fact, judge books by their covers. And why not? I know I sometimes do. If the right artist was hired, the cover of a book can lure you in faster than any poetry or prose found inside. And, seriously, why even check out the text if the cover is off-putting?

I sometimes think food is like that. Not all food, but produce. Fruits and vegetables are beautiful because they have to be. Their bright colors and sweet fragrance are what draw animals to the plant. The beauty of a fruit is what keeps it fertilized, growing, spreading new seeds.

Enter the ugli fuit. I've heard of it before, as it's the only item listed under the letter "U" in our beloved Eating the Alphabet by Lois Ehlert. At this point, there are very few foods in that book that we haven't all tried. A few are not available here, like the small Chinese watermelon, xigua. But some are simply hard to find, and ugli fruit is on that list. Trust DePiero's, my local market that always carries intriguing seasonal and imported produce, to provide something new. I was just there for a quick errand and couldn't resist wandering the produce department. I walked out with three new things, goldenberries, flat beans, and an ugli fruit.

Apparently, according to my friend the internet, goldenberries are also known as gooseberries. I thought they looked similar, but not quite the same. Maybe the ones I got today are just more ripe, or more golden. Naomi and I agreed that we "tried it, but didn't really like it." The flat beans, clearly a relative of the string bean, are crispy and sweet. These looked so wonderful today that I had to buy a bunch. Naomi loves raw string beans, often munching on a few while we walk around the supermarket. Why not bring home some slightly wider, slightly flatter, slightly bigger and squigglier flat beans? These were a big hit.
The ugli fruit seems to be some kind of citrus hybrid. I like pluots and tangelos, so I think I like all hybrids, I even drive one, actually. (Though after a more careful search it turns out I don't even know most hybrid fruits exist, check out this list!) I was excited to try the ugli fruit, and excited to cut it open with my curious kid who likes all things green and yellow, and is always game to taste a new fruit.

We cut it open and found the center to look like any citrus, but a bright golden color. The color was really beautiful. Our ugli fruit was very juicy, had big sections, and was a bit sour. Naomi and I agreed that it grew sweeter after a few bites.
Hooray for new fruits! Glad we didn't get scared away by the name.

Wednesday, January 26, 2011

Be My Valentine?


As usual, the Purl Bee serves as my inspiration. Last week I saw their post with directions for making Valentine's Day hair clips. I was excited to make some, and other than a quick stop at CVS for little hairclips, I have all the materials in my craft stash. I had the perfect opportunity to try this pattern out the other day.

I made the mistake once of not being accessible to my 3-year-old when she woke up scared one night. A mistake I have sworn to her that I won't repeat. When my husband is away or working late I don't like to work in my basement studio while the girls sleep upstairs. Even with the monitor on, I feel like I'm too far away. So, when my husband was away on business a lot in the last few weeks this project was a perfect one to work on while sitting quietly on the couch with some mindless TV on in the background.

I am a bit obsessed with these, if you couldn't tell. I have to say, I think mine are cuter than the all-pink ones on Purl's site. I like more colorful things, in general, in case you haven't noticed yet.

Follow all the directions as posted here. I suggest these minor changes:
1. The tiny hair clips they used could only be found near me with plastic on the top in different colors. That plastic made the clips hard to close when the felt was sewn on. I ripped the plastic off once noticing that, and the clips are a lot better. This would be true of larger clips, too.
2. In general, I think the tiny clips are a bit hard to get into the hair of very small kids without holding their head still and pressing hard. I suggest enlarging the pattern a bit to fit a slightly bigger clip, not grown-up sized, but average kids sized. You can see the two final sizes I made here, the smaller is the actual pattern from Purl, the larger is my own:
3. I think the clips are cuter when the back layer has pinked edges. I suggest making them all that way. In fact, I liked that look so much that I finally splurged and treated myself to a new pinking shears. The one I had was probably about 40 years old, not so sharp, and hard to use. My new Fiskars one is AMAZING! And, I happened to go to Joann's on a day that all sewing scissors were 40% off. I could not believe my luck--clearly the craft gods were smiling on me. And clearly they want me to make more felt projects with pinked edges.

This is the pile of little ones so far. (The photo at the top is the pile of bigger ones.)

Feel free to get creative with the shape of the felt and the placement of the embellishments. I love the ones with the off-set tiny hearts, and my daughter seems to prefer the rectangular clips. Thanks, Purl, for another great idea.


Quilt of the Week


If only I really had time to make a quilt a week...but I digress, and I haven't even started.

This one is a commissioned baby gift. The request was that it be the style of a quilt I made a few years ago (now living with a cutie pie named Lucy). The recipient likes light pink, light peach, light blue, etc.

Above, left to right, the original, the first layout (ugh), the final plan.

Amazing what different fabric can do to the same design. While working on this quilt I came to two realizations:
1. There is a big difference between light colors that are pastel and light colors that are bright. I am sure you can recognize a pastel, but finding the good light/brights is a bit tricky. Thank goodness I got some new things because the first layout for this one was aptly named the "Easter Basket" by my husband.
2. It's hard to recreate the feel of an old quilt with all new fabrics. Ultimately, I needed to let the new one live its own life. That's when it got good. I was finally happy with the fabrics and layout.

Then there was a new challenge. I ordered fabric online for the first time and was terrified. (I got everything from Hawthorne Threads, a great site though a few colors and scale of prints were hard to see clearly online.) The main fabric that I chose is a voile. I knew that before ordering, but I wasn't sure what it would mean. Well, voile is a lighter, sometimes sheer cotton fabric. I looked up this fabric line and found that it can be used for quilting, is not sheer, but is slippery. Hmmmm. It had been hard to find prints that I liked for this quilt, so I ordered this voile despite the slippery concerns. Indeed, it was a bit more slippery than a standard quilter's cotton. I found with careful pinning there was no problem sewing it, and the end result is a quilt that's really sumptuous and soft.

To sum it all up, all's well that ends well.

The top was pieced, the quilt sandwich prepared, and the binding was made.


All done! I like this one a lot, and I learned a lot making it.

Thursday, January 13, 2011

Children's Museum Costumes

While visiting my sister in Wayland, Mass, we went to the Children's Science and Discovery Museum in Acton. As a museum educator by trade, I was really impressed with this place. The museum is in an old house, and each room is a different theme. There is a water room, a jungle room, a color room, etc. Among the things I thought they did really well there were the costumes for dress up and imaginative play. Many rooms had costumes, which was fun in and of itself, not just one "dress-up" area like many children's museums. And all the costumes were made the same way. The great things about the costume construction, was that the kids could put them on by themselves, and knew exactly what to look for room to room.

The costumes were simple vests made of different materials, and, in some cases, with additional details attached. For example, in the boat room there was a pirate vest with a skull and crossbones on the back and a sea dragon vest made of some scaly material with a long tail and "spikes" sewn down the spine. In the jungle room was a black, faux-gorilla-fur vest and a tan fur vest with a lion's tail.

After taking a look at one of these costumes, it became clear that I would make some myself. I stumbled upon some leopard and zebra print minky fabric, so those are the first vests I've made. My three-year-old asked for a giraffe costume, so that will be next. I found some giraffe minky on my last trip to Joann's. I think the key is that the material has to have enough body to hold it's vest shape when being worn. It also should be comfortable, washable, and fun. I'm on the lookout for some pleather with an embossed alligator or snakeskin texture.

Here are some photos of my little one modeling the leopard costume:
The vest is a bit big on her, but I think she looks amazingly cute.

Now for some specifics:
I bought 1/2 yard pieces of each fabric, leopard and zebra. This is plenty to make two of each vest, including tails.


1. Cut out a rectangle about 16" x 30". Cut the opening of the vest by cutting a line from the center of one short end to the center of the rectangle. Cut a triangle with a 5" long side along the center fold of the fabric. The point of the triangle should be about 4 1/2" down the cut opening of the vest.

When the vest is folded, this is what your rectangle should look like.

2. Pin to mark arm holes. My first run I forgot to do this and I sewed the arms shut. Oops. I think 4 1/2" down from the fold is just right.
3. Roll the edges over to make a hem. Using zigzag stitch, sew from pin to pin to make the arm hole hem. Repeat with the front opening and head hole.

4. Sew the side seams.

5. Make the tail if appropriate to your costume. The tail is just a 3" x 7" rectangle. Lengthen or shorten the 7" side depending on what animal you're making. Either sew into a tube with right sides together and turn right-side out, or double fold so no raw edges are visible. Sew closed.

The leopard tail is just the plain rectangle. For the zebra I added a small piece of fringed black cotton to the end.
6. Hem the bottom of the vest, and attach the tail.

Now to find some cute pegs to hang these up, and we'll have a jungle dress up area in no time. Maybe I should work on some headbands with wire framed ears. I think I'm getting ahead of myself.

Tuesday, January 11, 2011

Ribollita

Many years ago, it's actually scary for me to think of how many, I was lucky enough to study in Florence, Italy for four weeks one summer. The biggest things that stick out as what made that summer so fantastic are the art and the food. You really can't go wrong in either category while in Florence. I won't go into too much detail about it here, but if you ever need a really good meal while in Florence I can tell you where to go.

There is one dish, however, that I'll tell you about. Ribollita. It means "twice boiled" and is a Tuscan peasant soup. Basically, a household would make this soup at the end of the week using whatever vegetables and bread were leftover from the week. We ate it one day in a little place that I think was called the Black Rooster, or Gallo Negro. It was a really delicious and hearty bowl of soup, a real soup meal. If you know my family, and you know that we're big soup people, it shouldn't surprise you that I wanted to make my own Ribollita.

We have the Tom Valenti cookbook, Soup, Stews, and One-Pot Meals. Like most cookbook owners, we haven't cooked most of the recipes in our cookbook collection. But when I wanted to find a good Ribollita recipe, Tom Valenti came through for me. This recipe is really very easy to make. The only real work is prepping all the veggies. It's a real one pot dish, making clean up easy, too.

Rather than type the whole thing out for you, I found this site with the recipe already posted. I will, however, share these photos of this week's Ribollita adventure. (By the way, for you kosher folk, this recipe is totally parve until you add the cheese at the end. You can skip that and use it as a vegetable soup, but with the cheese it's a great dairy option.)

Start out with your basic mirepoix (carrots, celery, and onion) with the addition of leek.
Then add the cabbage, kale, white beans, and canned tomato.Cook it, refrigerate it, and cook it again. This is the perfect recipe for weekend cooking but weeknight eating.Before serving, toast your bread to make the croutons. Beware of the recipe's instructions to place cheese topped bread under the broiler. Mine literally caught fire like nobody's business. I think you can skip that step.
This soup is so yummy, and full of so many healthy things. I actually pureed a small batch of it to use as baby food, and my 8-month-old loves it. I didn't add any salt and pepper so that it would be ok for her, but I found that the stock added plenty of seasoning, as does the final topping of grated Parmesan. Don't skip out on the cheesy crouton, either. The chunks of soup-soaked bread really make this dish.

Saturday, January 8, 2011

I'm That Cool Mom!

Well, at least today I am. I recently introduced my daughter to Rainbow Brite via YouTube. She's a big fan, as, I imagine, all daughters of the 80s were. So today, another cold snowy one in Jersey, she and I were busy playing with everything we could find in our basement playroom. She was pretending some multi-colored toy was Rainbow Brite when this idea hit me.

"Do you want to make a Rainbow Brite project with me?"
"Sure!"We made this wide, quilted belt. Naomi chose the fabric scraps from our color coded bags. And we appliqued a big star onto the front; it's Rainbow's magical star button that "shoots rainbows out" when she's on a quest to save Rainbowland. (Unfortunately, I did not have any velcro in my notions stash. So it closed with a safety pin until our run to Michael's this afternoon.) When I trimmed the belt to make it the right size, she discovered that the scrap piece made a perfect wristband! I knew there was a reason I never threw scraps away...
My happy child wore this belt all day, first over the above pictured nightgown, which looked all starry and bright, then later over her usual Rainbow Brite-ish outfit of mismatched everything. Now she's fast asleep wearing it over her mismatched pajamas, wrist band and all, dreaming of wearing it to school tomorrow.
Fantastic.

Wednesday, January 5, 2011

Woodstock Finally Laid to Rest

WAHOOOO!!! If you haven't yet read the post about the beginnings of this quilt, you can read it here. It's been a long time in the making, sort of ridiculously so given the simplicity of the design. And, if you're anything like my sister (or you are my sister) you're sick of reading about fennel. But there have been a number of major delays, not the least of which lately has been a more-than-a-little-annoying back injury. Turns out quilting doesn't hurt, but the quilt sandwich/basting step was quite a pain--both literally and figuratively.
The top was simple to piece as it's just pieced strips sewn with straight seams. The only slight complication is the order in which you need to attach the border. If you look closely above you can see what I mean.
Once the top was complete, it was quilt sandwich time. I saved a bit of time and irritation by doing two quilts at once. That's the Matisse quilt you see there.I decided to quilt this in parallel lines about a half inch apart. This was certainly more quilting than needed for the space, but I like the look of it a lot. And here's the back, a great Kaffe Fassett find:
Once quilted, I squared the whole thing off,

added the binding,and finished the whole thing! Thanks to some recent blog surfing of other quilters, I got a bit more daring with my photos. I like the snowy backdrop with this one.

Ahhhh. That's me sighing. It's finally done, and the wondrous fabrics from Woodstock Quilt Supply are, as they should be, in a wondrous quilt. At least I think so.